 Blog •
24/03/26
If you’ve ever thought, “I’ve watched so many 3D tutorials… why do I still feel stuck?” you’re not alone.
Most people are not struggling because they lack ability. They are struggling because the learning approach is too passive.
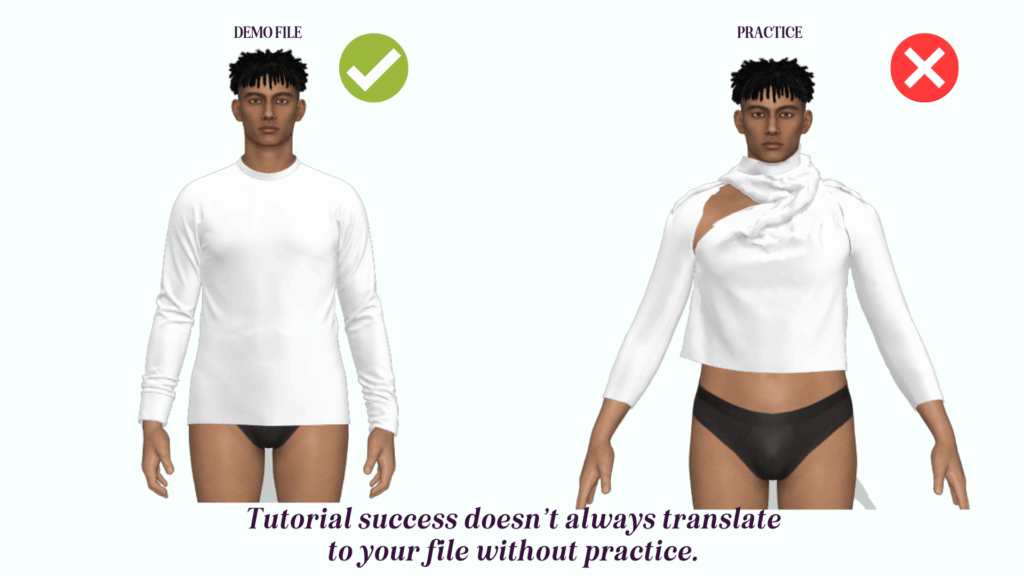
Tutorials are useful. I use them too. But if you only watch, the knowledge fades fast, especially when your real project doesn’t behave like the demo file.
I teach CLO3D for a living, and I see the same cycle repeatedly:
This is the learning trap.
The fix isn’t “more content”. It’s a repeatable practice habit that helps you build real skill, faster.
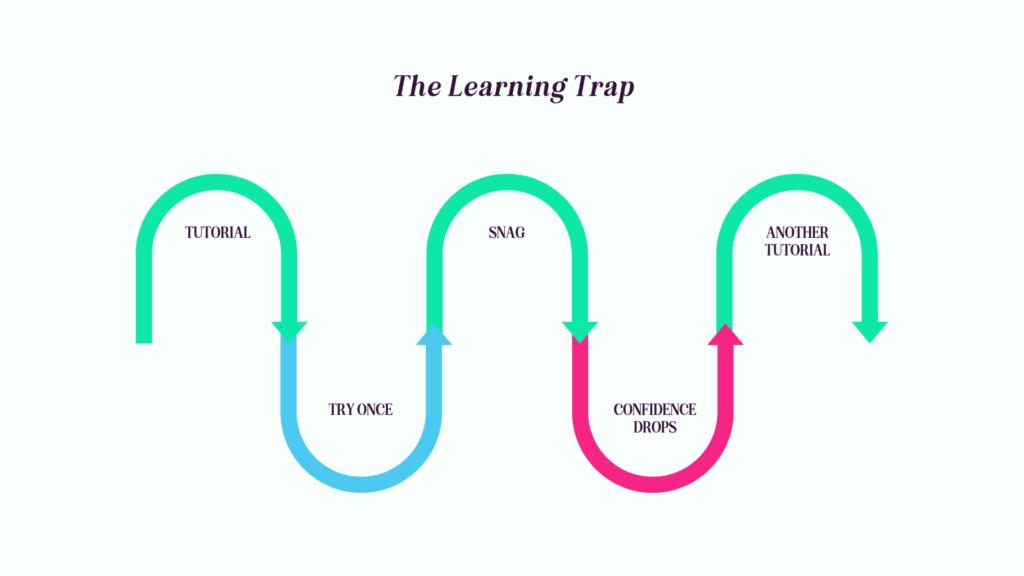
Tutorials can be brilliant. The issue is what happens after you watch.
If you don’t turn what you watched into a repeatable skill, you end up collecting information rather than building confidence. And CLO3D is one of those tools where confidence comes from solving real problems, not just following perfect steps.
A tutorial is a starting point. The real learning happens when you can apply it to your garment, your fabric, your construction, your workflow.
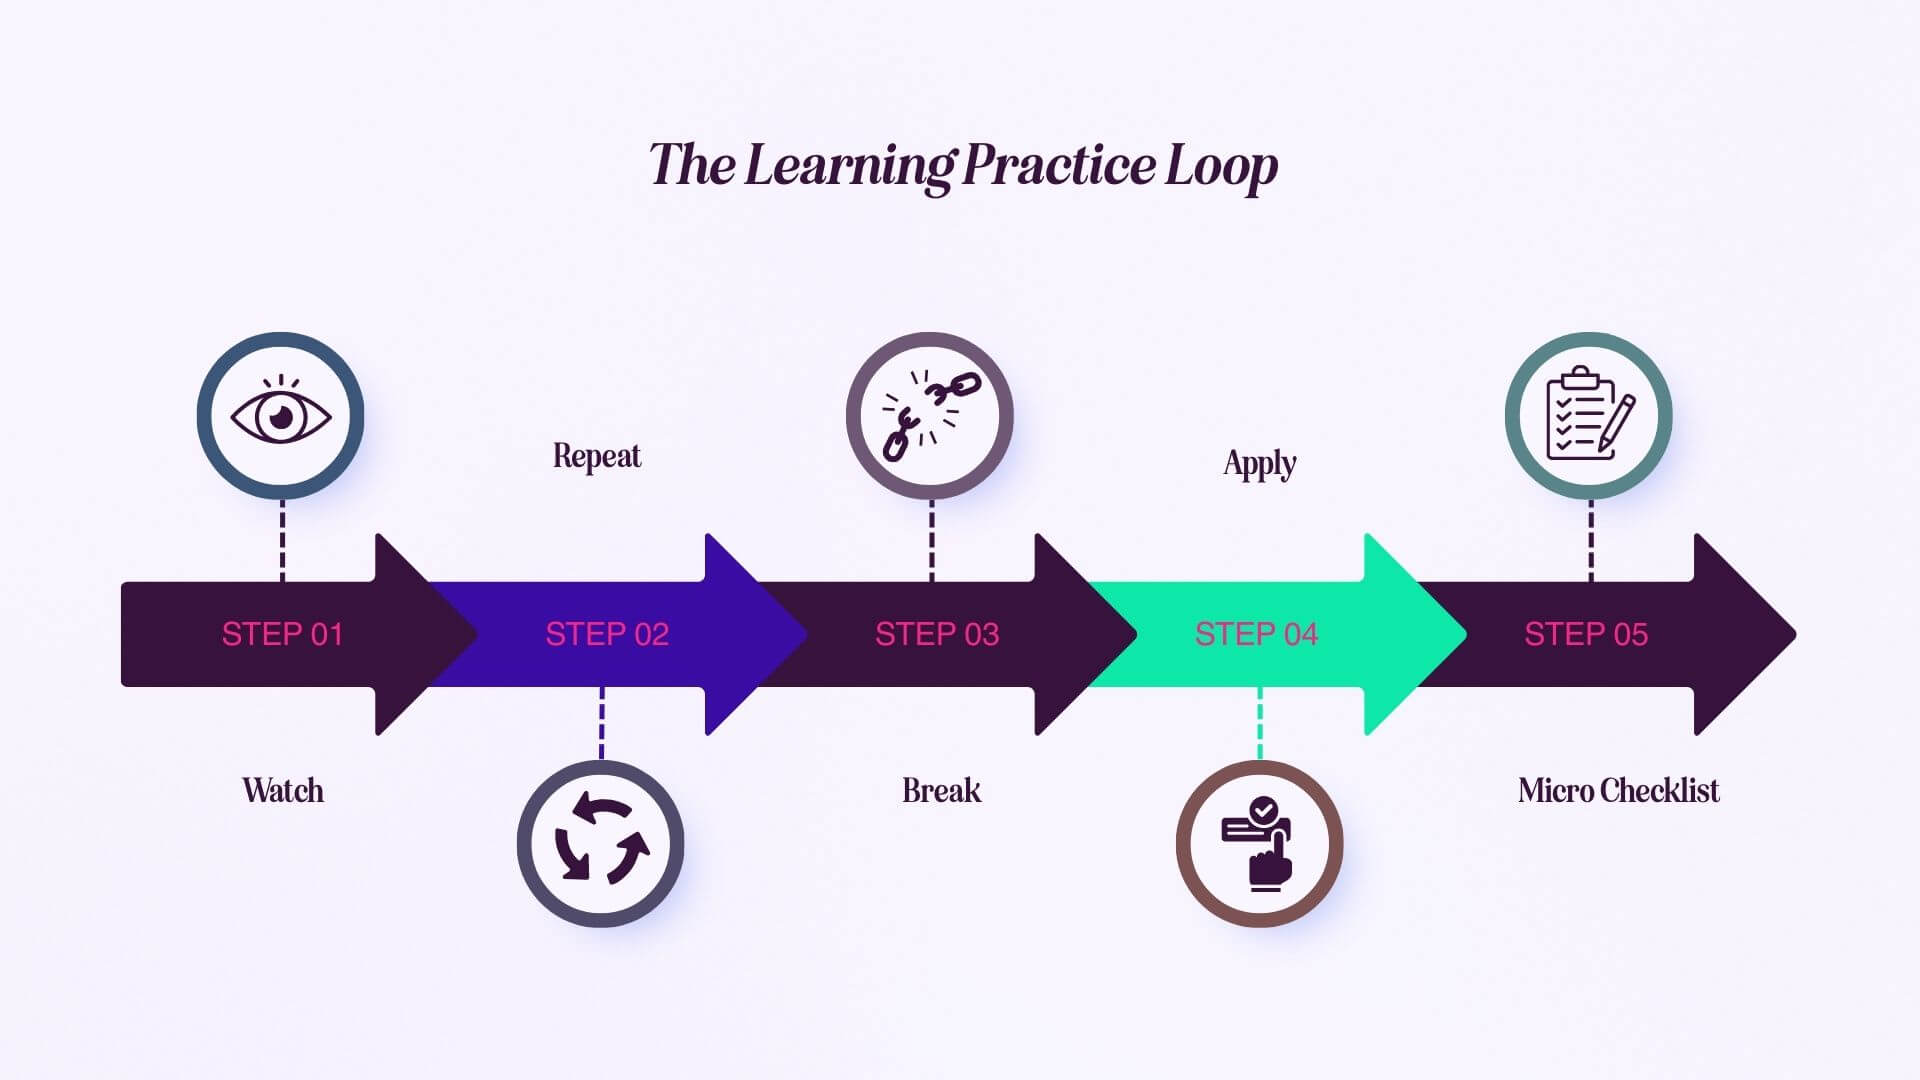
This is the loop I teach because it turns tutorials into actual skill and builds confidence quickly. It also stops you feeling overwhelmed because you’re focusing on one thing at a time.
Before you press play, decide what “success” looks like.
Not “learn sleeves”, but something like:
One goal. One session.
Rebuild the same action straight away.
This is where your brain turns “I saw it” into “I can do it”.
If you have to pause every few seconds, the content might be too advanced for the stage you’re at, or the task needs breaking down into smaller chunks.
This is the part most learners skip, and it’s where real understanding begins.
Change one variable on purpose:
Let it fail. Observe what changed.
When you can cause the problem deliberately, you stop fearing it, and you can fix it.
If you can only do it on the demo file, you haven’t integrated the skill yet.
Move the concept into your current project:
This is where speed and confidence start to build.
At the end, write a tiny checklist you can use later.
Three bullets is enough. For example:
Over time, this becomes your personal reference library built from your own learning.
If you’re learning CLO3D and you want a clear pathway, practical practice tasks, and feedback on real files, I offer tailored Digital Fashion Training for individuals and brands.
Instead of changing five settings at once, use the loop:
This removes the panic and turns it into a solvable workflow.
Layering issues are usually caused by one of a few things: incorrect layer order, pieces trapped/positioned badly, or trying to build details before the base garment is stable.
Use the loop and simplify:
Your fabric properties, pattern shapes, and construction logic might be different to the demo file, so the result will be different.
The practice loop forces you to:
The practice loop does two things that matter:
It also makes training far more effective. Learners arrive with real questions, real context, and a clearer understanding of what’s actually blocking them.
One of the biggest reasons people don’t progress is simple: they don’t leave space for practice time.
My approach is to teach in small chunks, demonstrate live, then build in follow-along practice straight away. After that, I give a clear mini task to complete before the next session.
Not busywork. Practice that reinforces one skill.
That structure is often the difference between “I watched it” and “I can do it on my own file.”
Tutorials can be enough if:
Training helps when:
Pick one skill and run the loop once:
Then stop.
Progress comes from doing less, but practising it properly.
If you would like a clear learning plan, practical exercises, and feedback on your own files (not demo ones), I offer tailored Digital Fashion Training for individuals and brands.